It’s back to school time here in Arizona and I’m SO excited about this Back To School DIY Felt Letter Board! I just think this is such a fun gift to bring to your new teacher on the first day of school! Want to know the best part of all? It costs less than $15 to put together and it’s something he or she can use ALL year long! That’s my kind of teacher’s gift!
**While I have this letter board described as a teacher’s gift idea, I actually made a few so I could use one as a first day of school sign for my nieces. Another great and handy way to use the board every year!
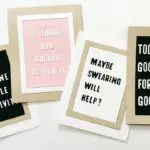
If you saw my contributor post on Love The Day a couple months ago, you already know I’m loving on the letter boards trend. They’re just so versatile, especially if you dress them up with a little Creative Mom 101 twist. I created the patriotic letter board from scratch but this one is already made and ready to go. So easy! If you’re interested in customizing the colors of the felt, then certainly follow along with my first tutorial on them.
This post may contain some affiliate links for your convenience. Clicking these links will help support this blog so I can keep creating things to share with you, but you will never pay more by using an affiliate link. Click here to read my full disclosure policy.
Materials:
- Felt Letter Board
- 5 Wood rulers
- Hand Saw & Miter Box
- Gorilla Super Glue
- Cardstock (for apple and ABC’s cutouts)
- Foam Adhesive Squares
Take a virtual run right over and stock up on these letter boards! You seriously cannot beat the price on these, especially since the plastic letters and numbers are included!
Once you have the letter board, the rest is easy! Start by getting your rulers ready. You’ll need four full size 12″ wood rulers and two pieces of ruler sized to 2 and 1/4 inches. I used a hand saw and miter box to cut the rulers. (If you’re lucky, a scissors might work for you!) Since you’re working with such a thin wood, you don’t need a lot of power. If you don’t have a saw, the people at Home Depot are usually pretty helpful when I need something cut.
I glued the smaller pieces to the full size rulers first using the Gorilla glue (just make sure you give it enough time to dry). I’m sure other glues would work as well, I just know this glue holds really well and I want this board to last!
Once the glue dries, you can use the same glue and glue the rulers onto your frame. I wanted to have full use of the actual letter board so I lined the rulers up with the frame and let the rulers hang over the outer edges. I can still stand mine up without a problem!
While the rulers are drying you can cutout your ABC’s and apple. I used my Cricut Machine for this part but you could cut by hand or maybe even find cutouts at your local craft store. I used my favorite foam adhesive squares to make the cutouts pop and not be so flat against the frame.
The final (and my favorite step) is to cut your letters and numbers off of the plastic and put a phrase on the board! Whatever phrase you decide on, these no-sew mini pom pom bags are the perfect accessory for holding all the leftover letters and numbers! I just changed the colors of the pom poms to keep with the back to school theme.
Whether you’re making this back to school letter board for yourself and your family or gifting it to a teacher this year, I hope you enjoy this DIY and have as much fun with it as I have so far!
LOVE THIS?! PIN FOR LATER…
Follow Creative Mom 101 on social media for more kids activities, crafts, and DIY projects for celebrating life’s moments big and small!
All photos and video by Creative Mom 101.