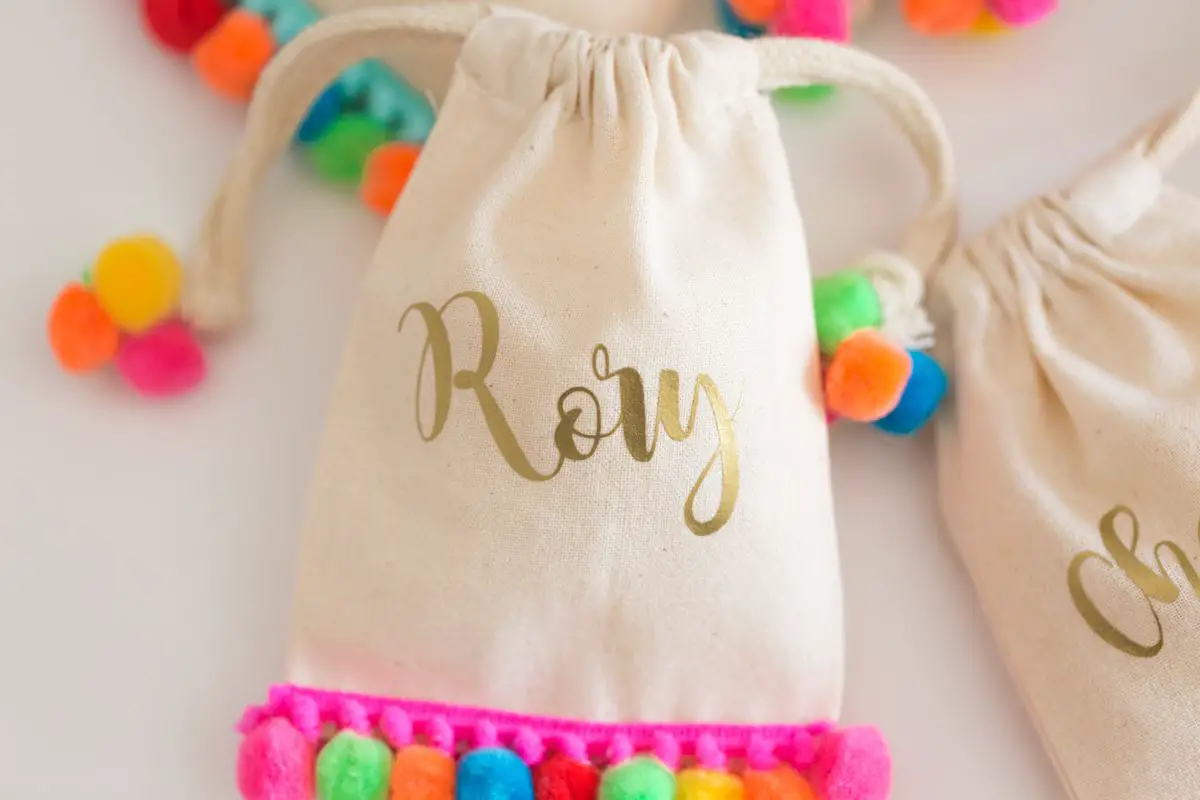
Anybody else riding the pom poms train right now?! I’ve been crushing on so many purses, dresses, and shoes lately that I had to find a way to incorporate them into some kid friendly party favors. These no-sew mini pom pom bags are what dreams are made of! Okay maybe not, but I like them enough that I might not give them to the kids like I had originally planned (just kidding!) Let’s get this pom poms party started!
Pin for later:
Materials Needed:
- Cotton pouches
- Trim
- Pom Poms (I used the 1/2 inch bright and red pom poms)
- Glue gun and glue
- Scissors
- Lighter (to burn the ends of trim) * not shown in the video because I didn’t want to burn my house down
- Cutting Machine
- Iron on vinyl
- Iron
DIY Video:
Instructions:
I started with these cotton pouches. As you can see they have all sorts of sizes, I already had a bunch of small ones (4″x6″) because they’re always great for holding party favors.
Next, I ironed on names to each bag. (You can download the free font here) I used my Cricut to cut out each name in the iron on vinyl. If you don’t have a Cricut you could leave the bags plain or find iron on letters. My friend Anna over at Mamoo Kids has amazing ones if you have the time to order them. You just want to make sure the letters fit whatever size bag you go with.
Once the name is in place, the fun begins! I found a pack of scrap ribbon and liked the colors in it, so that’s what I used as a trim. I typically use rolls of just one color for the bags in my shop!
Cut the trim to about 4 inches so it fits with the bottom of the bag. I used a lighter to burn the edges of the trim to seal it. Next pick out what pom pom colors you want, I used 9-10 on each bag. Then you can use your glue gun to start gluing the pom poms to the end of the trim. I tried to keep mine as close to the edge as possible so they had more of a dangle effect. You could certainly sew or use fabric glue to make the bags a little more secure, but I liked the ease of using hot glue. It dries quickly and it seems pretty sturdy, I was trying to pull some pom poms off and they wouldn’t budge!
The last step is to glue some pom poms onto the ends of the handle. Certainly not necessary, but as my 4-year old niece would say, I’m just adding details!
And there you have it! Fill these bags with age appropriate favors and you’re all set to rock the pom poms trend at your next party!
Leave your questions in the comments and if you make your own version, please share, I’d love to see!
Follow Creative Mom 101 on social media for more kids activities, crafts, and DIY projects for celebrating life’s moments big and small!
All photos and video by Creative Mom 101.


